- Regular cleaning of a metal roof prevents rust, moss, algae, debris buildup, and preserves protective coatings, extending its lifespan.
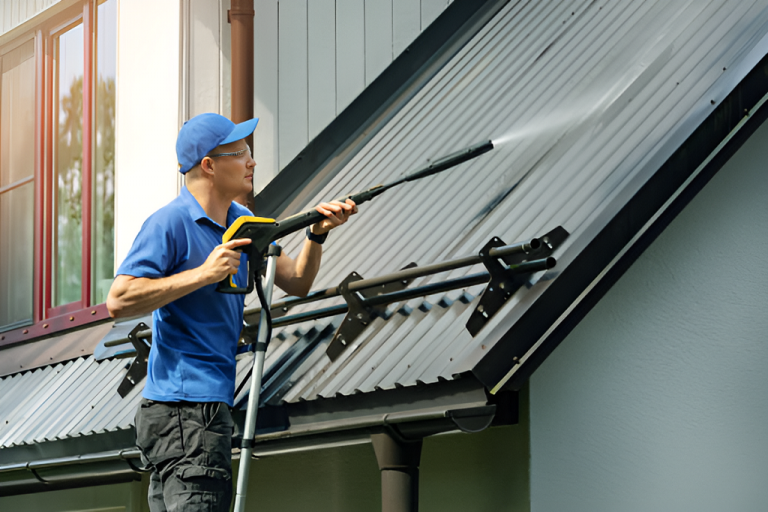
- Safety is critical: wear slip-resistant shoes, gloves, and a safety harness, and consider professional help for steep or high roofs.
- Proper inspection before cleaning is essential—look for rust spots, loose screws, damaged sealants, and moss or debris.
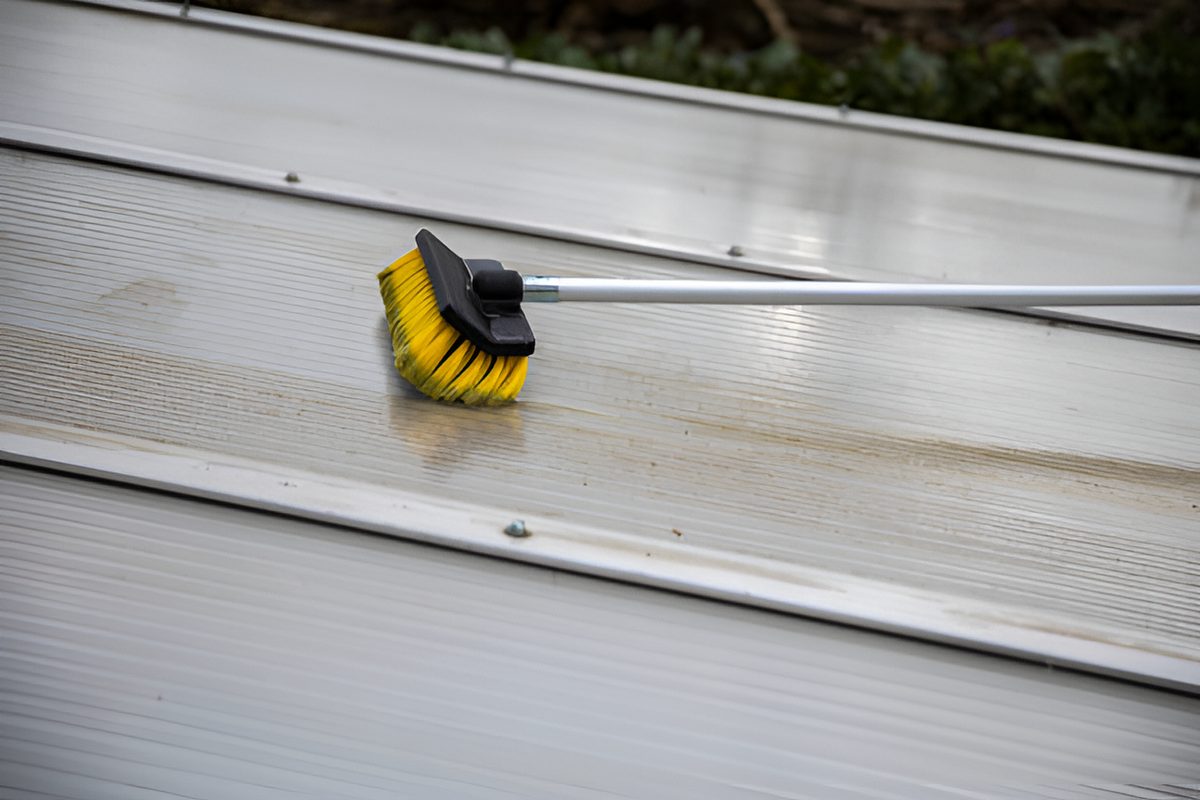
- Use gentle cleaning solutions, soft-bristled brushes, and avoid harsh chemicals or abrasive tools to protect the roof’s finish.
- Rinse thoroughly using a garden hose or low-pressure washer, always working from top to bottom to prevent streaking and water pooling.
- Address rust or stains promptly with sanding, primers, and protective coatings to prevent long-term damage.
- Routine maintenance—like trimming nearby trees, clearing gutters, and scheduling regular cleanings—reduces debris buildup and prolongs roof life.
Metal roofs are known for their durability, energy efficiency, and long lifespan, but like any roofing material, they need proper care to maintain their appearance and functionality. Cleaning a metal roof not only improves curb appeal but also prevents corrosion, moss growth, and potential damage. In this guide, we’ll cover everything you need to know about how to clean a metal roof, step by step.
Why Is Cleaning a Metal Roof Important?
Keeping your metal roof clean isn’t just about aesthetics. Over time, metal roofs can accumulate dirt, debris, moss, algae, and even rust. These factors can:
- Cause scratches and deterioration of protective coatings
- Promote corrosion in exposed areas
- Block gutters and downspouts, leading to water damage
- Reduce the roof’s energy efficiency by affecting reflective surfaces
Regular cleaning ensures your roof continues to protect your home efficiently while looking great. Most experts recommend cleaning a metal roof at least once or twice a year, depending on your environment and climate.
What Supplies Do You Need to Clean a Metal Roof?
Before starting, gather the right tools and materials. Having everything ready ensures you can work safely and efficiently. Here’s a typical list:
- Soft-bristled brush or push broom
- Garden hose with a spray nozzle
- Bucket for water and cleaning solution
- Mild detergent or metal roof cleaner
- Safety harness and gloves
- Ladder (if needed) or scaffolding
- Plastic scraper (for stubborn debris or moss)
- Pressure washer (optional, on low pressure)
Avoid using harsh chemicals or abrasive tools, as they can scratch the roof or remove protective coatings.
Is It Safe to Clean a Metal Roof Yourself?
Yes, but safety is critical. Metal roofs can be slippery, especially when wet. Here are some safety tips:
- Wear slip-resistant shoes and gloves
- Use a safety harness if working on a steep roof
- Avoid walking on wet or mossy areas
- Have a helper to assist or monitor from the ground
- Use ladders and scaffolding securely
If you feel uncomfortable or your roof is very high, it may be safer to hire a professional roof cleaner.
Step 1: Inspect Your Roof
Before starting the cleaning process, a thorough inspection is critical. Not only does this help you plan your cleaning, but it also ensures you can address minor issues before they become major problems.
Check your roof for:
- Rust spots: Look for any discolored patches, bubbling paint, or areas where the metal is exposed. Rust can spread quickly if left untreated.
- Loose screws or panels: Inspect all screws, bolts, and seams. Loose panels or missing fasteners can create leaks and make cleaning unsafe.
- Damaged sealants: Check the edges, joints, and around penetrations (like vents and skylights) for cracked or peeling sealant. Damaged sealants should be repaired before washing.
- Moss, algae, or debris buildup: Look in shaded areas, valleys, and around gutters where moss or algae tends to grow. This buildup not only looks unsightly but can trap moisture and accelerate corrosion.
Tip: Take photos of any problem areas so you can monitor them over time. Identifying these issues beforehand allows you to handle them during cleaning and prevents further damage.
Step 2: Remove Loose Debris
Before applying any cleaning solution, remove surface debris that could scratch your roof or clog your gutters.
- Sweep with a soft-bristled broom or push broom: Gently sweep away leaves, twigs, and dirt. Avoid scrubbing too hard, especially on painted surfaces.
- Never use metal brushes: Abrasive tools can scratch the roof, damage paint, and remove protective coatings.
- Clear gutters and downspouts: Leaves and debris in gutters can cause water to back up, potentially damaging your roof and fascia.
Tip: Work from the top down when removing debris to avoid accidentally stepping on loose material that could cause you to slip. This step also ensures a clean surface for the cleaning solution to work effectively.
Step 3: Prepare Your Cleaning Solution
Using the right cleaning solution is essential for protecting your metal roof while removing dirt, moss, or algae.
- Mild detergent: For general dirt, mix a gentle dish soap or roof cleaner with water in a bucket. Avoid harsh chemicals that could damage coatings.
- Algae and moss removal: Use a commercial moss/algae cleaner or a homemade 50/50 solution of vinegar and water. This helps kill and loosen growth without harming the roof.
- Bleach caution: Only use bleach for stubborn stains, and ensure it’s diluted. Test in a small area first, as bleach can discolor paint and harm surrounding plants.
- Manufacturer guidelines: Always check the roof manufacturer’s recommendations for cleaning agents, as some coatings are sensitive to strong chemicals.
Tip: Mixing the solution in a pump sprayer allows for even application and easier rinsing later.
Step 4: Apply the Cleaning Solution
Proper application ensures the solution can break down dirt, moss, and stains without leaving residue.
- Spray or brush on evenly: Use a garden sprayer, sponge, or soft brush. Cover the roof thoroughly, especially in problem areas.
- Start from the bottom: Applying from the bottom up prevents streaks and ensures the cleaning solution reaches every part of the roof.
- Let it sit: Allow 10–15 minutes for the solution to loosen debris, moss, or stains. Don’t let it dry completely, as dried cleaner can leave residue.
Tip: Avoid working in direct, strong sunlight to prevent rapid drying of the solution, which can leave streaks or spots.
Step 5: Scrub Gently
Scrubbing helps remove stubborn dirt, algae, and moss while preserving your roof’s finish.
- Use a soft-bristled brush or broom: Scrub gently, focusing on problem areas.
- Plastic scraper for tough spots: For hardened moss or dirt, a plastic scraper can lift debris without scratching the roof.
- Avoid wire brushes or abrasive pads: These can scratch paint, remove protective coatings, and expose metal to rust.
Tip: Work in small sections to ensure the solution stays moist while scrubbing, maximizing cleaning efficiency.
Step 6: Rinse Thoroughly
Rinsing is crucial to remove all cleaning solution and loosened debris.
- Use a garden hose or low-pressure washer: Avoid high pressure, which can damage seams, fasteners, or coatings.
- Top-down approach: Start from the top of the roof and work downward to flush debris into gutters naturally.
- Ensure clear drainage: Confirm gutters and downspouts are free of debris to avoid water pooling and potential damage.
Tip: If using a pressure washer, maintain at least a 3-foot distance and use a fan spray nozzle to minimize damage.
Step 7: Address Rust or Stains
After cleaning, inspect your roof again for stains or early rust. Treating these promptly prevents long-term damage.
- Rust removal: Lightly sand rusted areas, then apply a metal roof primer and matching paint.
- Minor stains: Baking soda mixed with water or vinegar solutions can help remove small stains without harsh chemicals.
- Test first: Always try cleaning solutions on a small, inconspicuous area to avoid discoloration.
Tip: Regular post-cleaning inspections allow you to address minor issues before they escalate into costly repairs.
Step 8: Maintain Your Roof After Cleaning
Cleaning is just one part of ongoing roof maintenance. Proper care prolongs its life and appearance.
- Check fasteners and panels: Ensure all screws, bolts, and panels are secure after cleaning.
- Apply protective coatings: Older roofs or those showing signs of wear can benefit from a UV-resistant or anti-rust coating.
- Schedule routine cleaning: Clean every 6–12 months, with more frequent cleaning for shaded or moss-prone areas.
- Trim nearby trees: Reducing overhanging branches minimizes leaf accumulation, debris, and moss growth.
Tip: Keeping a roof maintenance checklist helps you stay on schedule and ensures no detail is overlooked.
Common Questions About Cleaning Metal Roofs
Can I use a pressure washer on a metal roof?
Yes, but use low pressure. High-pressure water can damage paint or coatings and even loosen panels.
Is bleach safe for metal roofs?
Only in diluted form and for tough moss or algae stains. Always rinse thoroughly and avoid prolonged contact with painted surfaces.
How long does it take to clean a metal roof?
Depending on roof size and condition, cleaning can take a few hours to a full day. Smaller roofs may take less than 3 hours, while large or steep roofs require more time.
Do I need to hire a professional?
If your roof is steep, high, or difficult to access, hiring a professional ensures safety and proper cleaning without risk of damage.
Tips for Keeping Your Metal Roof Clean Longer
- Keep gutters and downspouts free of debris
- Trim overhanging tree branches to reduce leaf accumulation
- Consider a protective roof coating to prevent rust and stains
- Remove moss, algae, or bird droppings promptly
- Inspect your roof regularly for early signs of damage
These small steps reduce the frequency of intensive cleaning and prolong your roof’s lifespan.
Eco-Friendly Cleaning Options
For homeowners concerned about the environment:
- Use vinegar and water solutions for algae and moss removal
- Avoid harsh chemical cleaners that can runoff into soil or waterways
- Collect rinse water if possible and dispose of it responsibly
Eco-friendly cleaning methods can be just as effective without harming plants, pets, or local ecosystems.
How Often Should You Clean a Metal Roof?
- Mild climates: Once every 12 months
- Rainy or shaded areas: Every 6-9 months
- After storms or extreme weather: Inspect and clean as needed
Regular cleaning prevents moss growth, rust, and debris buildup that can cause long-term damage.
DIY vs Professional Cleaning: Which Is Better?
DIY Pros:
- Cost-effective
- Flexible scheduling
- Personal satisfaction
DIY Cons:
- Safety risks, especially on steep or high roofs
- May not address severe rust or damage
- Time-consuming
Professional Pros:
- Safer for difficult roofs
- Experienced in handling stubborn stains and rust
- Can spot issues early
Professional Cons:
- Higher cost
- Scheduling required
Ultimately, the choice depends on your comfort level, roof accessibility, and the extent of cleaning needed.
Signs Your Metal Roof Needs Extra Attention
- Visible rust spots or paint peeling
- Moss, algae, or lichen covering large areas
- Loose or missing screws and panels
- Water pooling in gutters or around the roof edge
Addressing these issues early can save significant repair costs later.
Closing Thoughts
Cleaning a metal roof is an essential part of home maintenance. Knowing how to clean a metal roof properly ensures your roof stays functional, attractive, and long-lasting. By following this step-by-step guide, using safe cleaning methods, and maintaining your roof regularly, you can protect your investment for decades. Whether you choose a DIY approach or hire a professional, the key is consistency and attention to detail.